Tools needed:
- 3/8" drive ratchet
- 1/2" drive ratchet
- 15MM socket 3/8" drive
- 18MM socket 3/8" drive
- 21MM socket 3/8" drive
- 36MM deep well socket (impact socket) 1/2" drive
- 13MM combo wrench
- T-50 torx bit 3/8" drive
- Big Crescent Wrench 18
- Small Sledge hammer 3 1/2 pounder
Lets get started:
Start by shutting off the air ride with the switch in the trunk.
-
Jack up the rear of the car and place it on jack stands.
-
Remove the rear wheels.
-
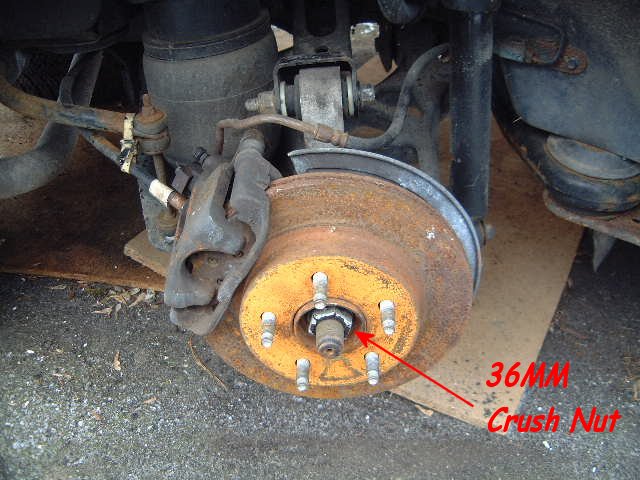
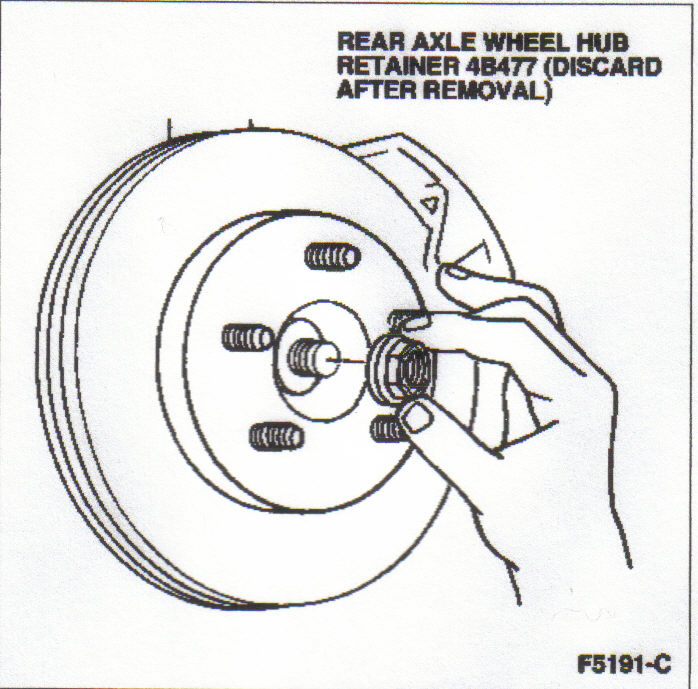
Now remove the 36MM crush nut, and discard (new ones need to be ordered, part number F0SZ-4B477-A)
-
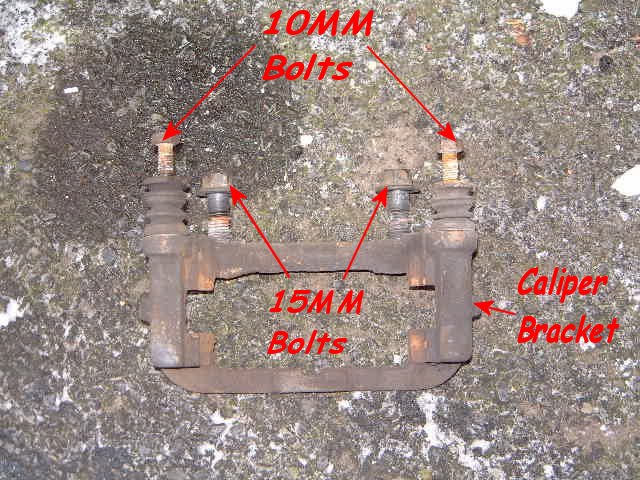
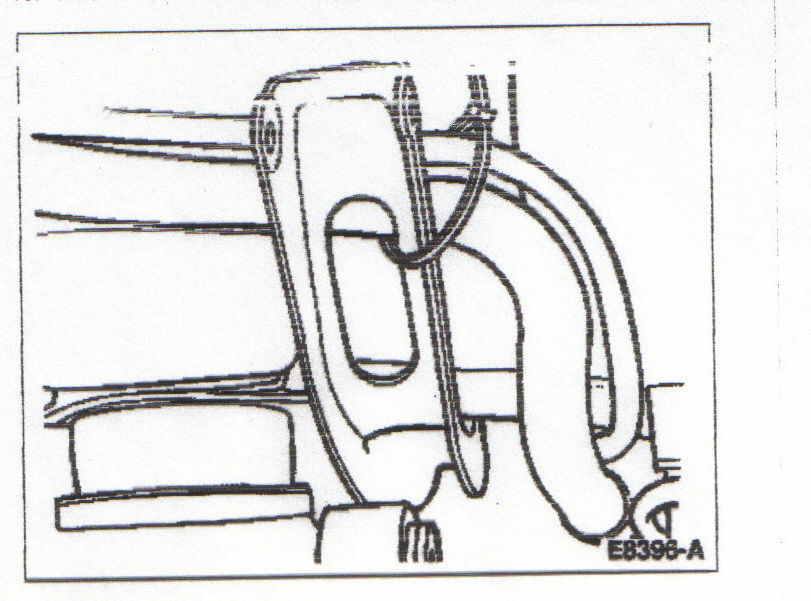
Remove the brake caliper by first removing the 13MM bolts that hold it to the caliper bracket, remove brake shoes, and lay them aside. (picture taken of part removed for clarification purposes)
-
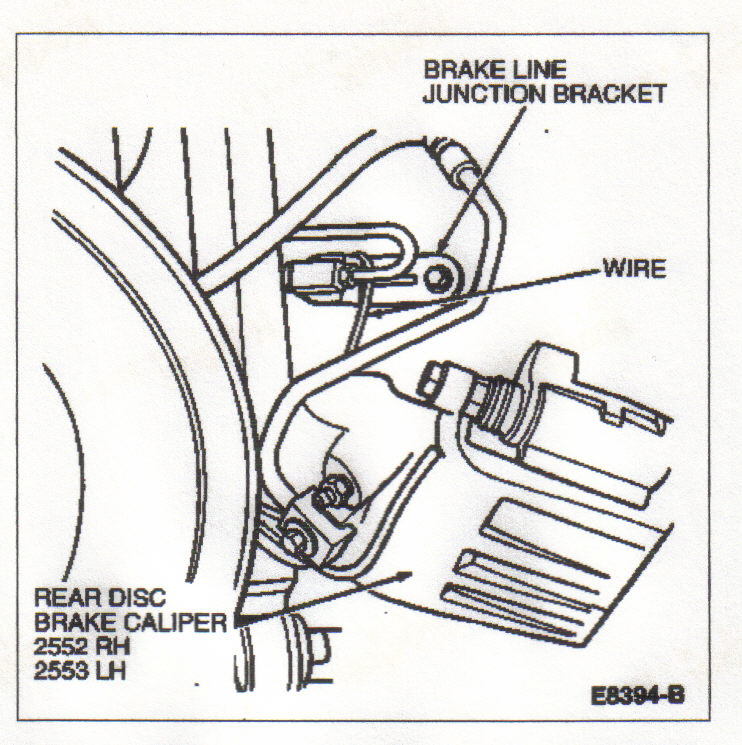
Hang the caliper with a coat hanger to the brake junction bracket as shown in the following picture.....WARNING: DO NOT allow the caliper to hang freely or damage to the brake lines may occur!
-
Now remove the 15MM bolts that hold the caliper bracket to the hub assembly.
-
Remove the rear rotor and lay aside (replace brake shoes and rotors as necessary).
-
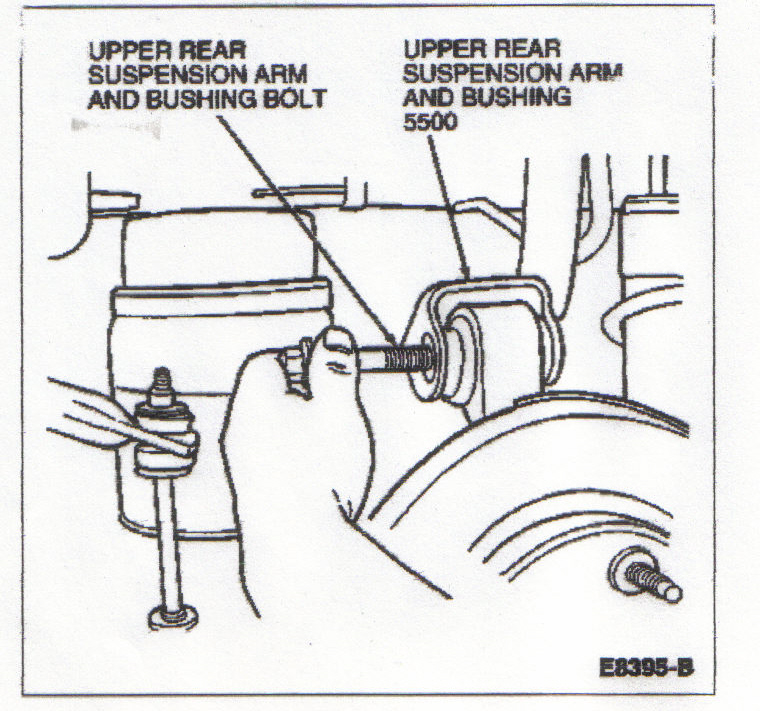
Remove upper rear hub assembly bolt/nut.
-
Tie back the upper suspension arm back and out of the way.
-
Using a paint marker, mark the position of the lower rear suspension arm and bushing in relation to the rear wheel knuckle with the lower bushings in their relaxed position.
CAUTION: Failure to mark this position will result in bushing wind-up on assembly and incorrect ride height, causing misalignment and premature tire wear.
NOTE: When upper rear suspension arm and bushing bolt is removed from the knuckle, the lower bushings will return to their relaxed positions.
-
Remove the 2 lower hub assembly bolts by using the t-50 Torx bit, the ratchet, and the big Crescent Wrench. Be careful of the wahsers, because they have to go back in the same spot as they came from. They go between the hub assembly rubber bushings and the lower connection points for the hub assembly.
-
Now, take that sledge hammer, and lightly tap the half shaft thru the center of the hub.
-
Now, if you are planning on removing the bearings, you can either try to attempt this yourself (with the correct tools/presses), or you can take it to your local auto shop and for a small fee they can remove and replace the bearings for you (there is also a small c-clip on the rear of the assembly that hold the bearing in place....that will need to be removed if you are doing this yourself).
-
Now just perform these steps in reverse order....paying CLOSE attention to the placement of the washers that were removed, and the scribe marks for the bushings.
If you have any questions/comments please feel free to email me at the link provided below.
Author:
- Ray Urso (drgnfrm) wykdmk8@hotmail.com