What you need:
#10 Torx head screwdriver
#2 Phillips head screwdeiver
8mm socket
10mm socket
Socket driver and 4" or greater extender
two small wire nuts or barrel connectors
one HID bulb
30-60 minutes of your time
General instructions:
Disconnect Battery
Remove housing and disconnect fittings
R/R bulb.
Reconnect fittings and reinstall housing
Reconnect battery
Sounds simple, but there's a wealth of pitfalls if you've never done this before. I think I found them all, with the exception of breaking the bulb. Do NOT touch the bulb at any time or allow it to get dirty. This can degrade performance and even shorten bulb life.
Step 1:
Disconnect battery.
You need to disconnect the battery before doing any electrical work. If you're doing the driver's side, you might as well remove it completely to give better access to the bolt-head housing screws. You DONT want to lose one of these down the front, so anything that helps you prevent that is worth doing.
Step 2:
Remove housing and disconnect fittings.
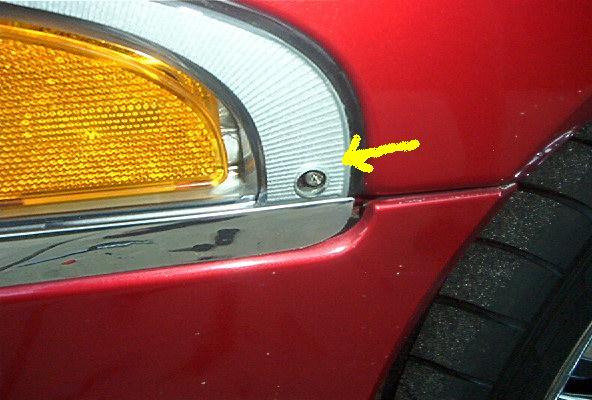
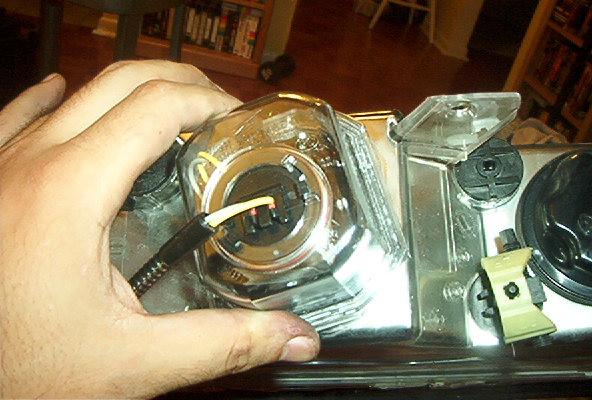
Remove the Phillips head screw on the side of the housing, by the side lamp, seen in illustration 1.
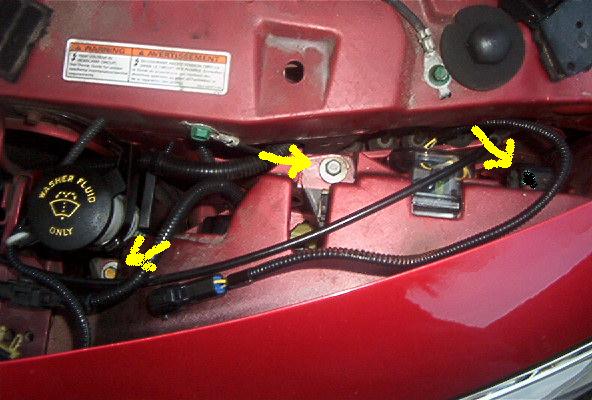
Remove the three silver bolt-head screws that hold the housing to the bulkhead of the engine bay, as seen in illustration 2. The rightmost screw didnt catch the flash well, so it looks charcoal grey, but it is the same as the other two. You'll need the extender to get at the outboard two. These are the ones that are easy to lose.
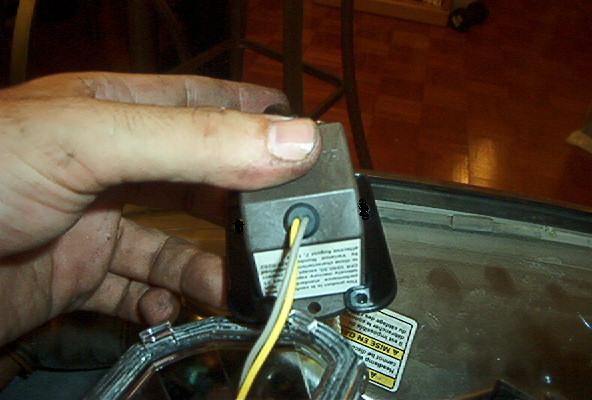
Unplug the high beam fitting. If your replacement bulb has the proper fitting, unplug it. If the fitting is mismatched, cut the yellow and the gray wires. Dont do it near the plug, though, as you want to leave some leeway as to where the wire nuts or barrel connectors will go.
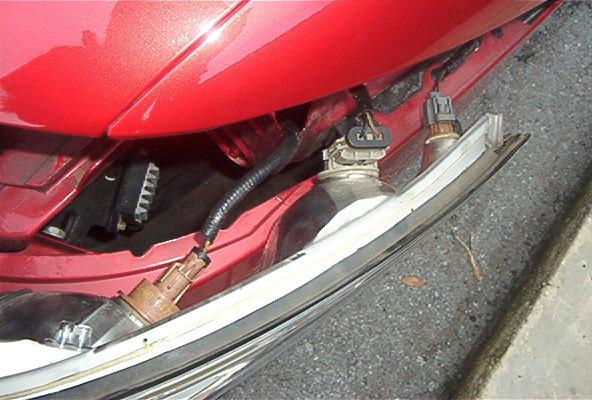
Slide the housing out just a bit, enough to disconnect the three fittings shown in illustration 3.
Step 3:
Remove and replace bulb.
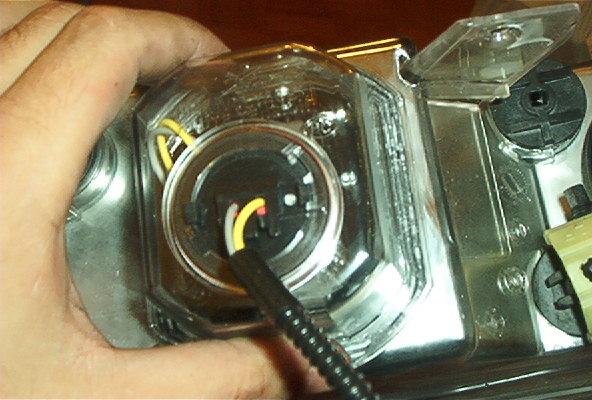
Take the housing somewhere well lit with somewhere stable to sit and work. The clear plastic box is what we're concerned with, as in illustration 4.
Slowly rotate it counter-clockwise about 30 degrees, until the tabs are free, as in illustration 5.
Gently pull it straight backwards, to reveal the black yoke clip that holds the bulb in place. Dont do anything with the Phillps head next to the bubble level. Thats your up/down aim adjusting screw. Remove the three Torx head screws, shown in illustration 6.

Gently pull the yoke and bulb assembly out of the housing, as in illustration 7.
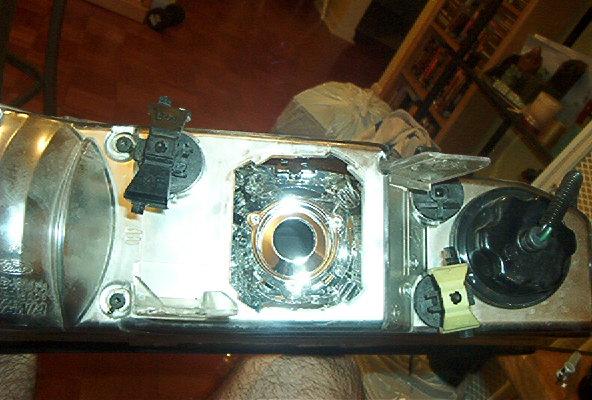
The top two screws also hold the yoke to the bulb. Remove the old bulb and replace it with the new, using only the top two screws. The holes are not threaded. Your housing should now look like illustration 8.
Attach the yoke and new bulb assembly to the housing with the three Torx head screws.
Reinstall the clear plastic cover/box. You will need to apply some pressure inwards (toward the housing) while you turn, to compress and seal the gasket.
Step 4:
Reconnect fittings and reinstall housing.
Put the housing in part of the way. Reconnect the three fittings shown in illustration 3, above. Push the housing back in fully, making sure not to bind any wires, plugs, etc. Reattach the three bolt-head housing screws. Reattach the Phillips head screw.
Plug the high beam fitting back in. If your new HID bulb had the proper fitting, plug it back in as well. If you had to cut wires, find a decent place to splice such that the connectors will be down out of the way of the hood when it closes. Seal them somehow so that water cannot get into the splice. I used part of a clear freezer bag and electrical tape.
Step 5:
Reconnect/reinstall battery.
Kinda obvious, but take the usual precautions with the terminals. You'll also lose yur radio presets and your clock will reset. Seat memory, however, should remain.
Test your new HID bulb and enjoy driving with two lights again!