Turn off suspension in the trunk.
-
Jack up the front of the car and put it on jack stands (if you do not have a lift that is).
-
Now remove the serpentine belt by using the 1/2" breaker bar.
-
Slide under the car and find the A/C compressor which is on the passenger side of the engine.
-
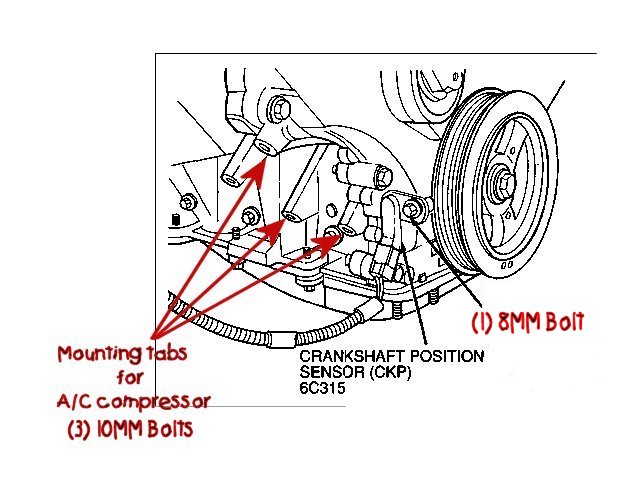
Locate the (3) 10MM bolts that secure the compressor to the block....there are 2 on the bottom and 1 on the top of the compressor.
-
Loosen COMPLETELY, but do not remove the (3) 10MM bolts that secure the A/C compressor to the block.
-
Slide the A/C compressor out of the way (you will need to slide it as far away as possible.....but be VERY careful not to break the A/C lines that are attached to the compressor!).
-
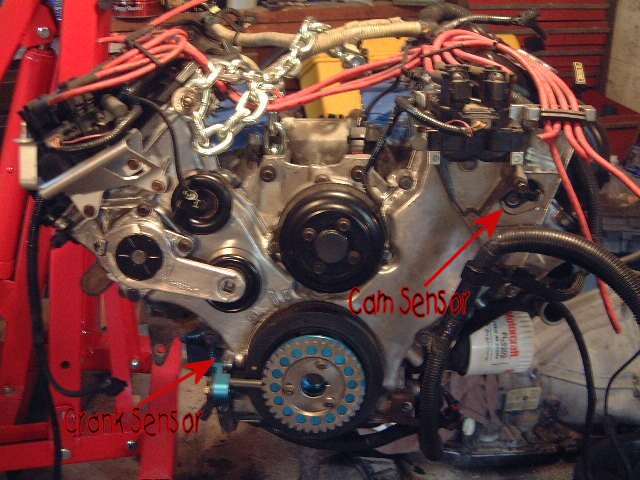
Remove the 8MM bolt that secures the crankshaft position sensor to the block.
-
Remove the sensor from engine.
-
Check the area around the cam sensor, and clean area as necessary to not allow any dirt/debris into the engine.
-
Use some of the left over oil from removed sensor to lubricate the o-ring on new sensor.
-
Slide new sensor into engine.
-
Secure it to the engine with the 8MM bolt removed from the old one.
-
Reposition A/C compressor to the block so that the bolts are aligned.
-
While holding the A/C compressor in place, with your hand, start the (3) 10MM bolts that were loosened earlier.
-
Now tighten the (3) 10MM bolts to the engine securely.
-
Remove car from jack stands (or lift if so equipped).
-
Lower car back to ground with jack.
-
Place the serpentine belt back on.
-
Turn on suspension in trunk.